Flume 安装
# 下载
在 Flume 官网提供的下载地址 (opens new window)点击apache-flume-1.9.0-bin.tar.gz下载,大约 60M。
# 安装
- 将下载的安装包上传至 Linux 服务器,并解压到
/opt/module目录
tar -zxf apache-flume-1.9.0-bin.tar.gz -C /opt/module/
1
- 进入到
/opt/module目录并对文件夹重命名
cd /opt/module
mv apache-flume-1.9.0-bin flume
1
2
2
- 将 conf 目录下的 flume-env.sh.template 文件修改为 flume-env.sh
mv flume-env.sh.template flume-env.sh
1
- 在 flume-env.sh 中添加
JAVA_HOME
export JAVA_HOME={JAVA_HOME} # 配置自己的JAVA_HOME
1
至此,Flume 安装已经完成,可以通过一个简单案例测试是否安装正常。
# 简单案例
需求:通过 telnet 工具向本机 44444 端口发送消息,最后 Flume 将监听的数据实时显示在控制台。
提示
请确保 telnet 工具已经正确安装且可以正常使用。需同事安装 telnet 以及 telnet-server。
在 flume 安装目录下执行bin/flume-ng help可以查看 flume 的相关参数:
Usage: bin/flume-ng <command> [options]...

commands:
  help                      display this help text
  agent                     run a Flume agent
  avro-client               run an avro Flume client
  version                   show Flume version info

global options:
  --conf,-c <conf>          use configs in <conf> directory
  --classpath,-C <cp>       append to the classpath
  --dryrun,-d               do not actually start Flume, just print the command
  --plugins-path <dirs>     colon-separated list of plugins.d directories. See the
                            plugins.d section in the user guide for more details.
                            Default: $FLUME_HOME/plugins.d
  -Dproperty=value          sets a Java system property value
  -Xproperty=value          sets a Java -X option

agent options:
  --name,-n <name>          the name of this agent (required)
  --conf-file,-f <file>     specify a config file (required if -z missing)
  --zkConnString,-z <str>   specify the ZooKeeper connection to use (required if -f missing)
  --zkBasePath,-p <path>    specify the base path in ZooKeeper for agent configs
  --no-reload-conf          do not reload config file if changed
  --help,-h                 display help text

avro-client options:
  --rpcProps,-P <file>   RPC client properties file with server connection params
  --host,-H <host>       hostname to which events will be sent
  --port,-p <port>       port of the avro source
  --dirname <dir>        directory to stream to avro source
  --filename,-F <file>   text file to stream to avro source (default: std input)
  --headerFile,-R <file> File containing event headers as key/value pairs on each new line
  --help,-h              display help text

  Either --rpcProps or both --host and --port must be specified.

Note that if <conf> directory is specified, then it is always included first
in the classpath.
1
2
3
4
5
6
7
8
9
10
11
12
13
14
15
16
17
18
19
20
21
22
23
24
25
26
27
28
29
30
31
32
33
34
35
36
37
38
39
2
3
4
5
6
7
8
9
10
11
12
13
14
15
16
17
18
19
20
21
22
23
24
25
26
27
28
29
30
31
32
33
34
35
36
37
38
39
重点参数:
- --conf,-c:指定 flume 的配置文件,一般为安装目录下的 conf 目录
- -Dproperty=value:指定运行过程中的动态参数,property 和 value 可以按需指定为相应的键值对
- --name,-n:指定要运行的 agent 的名字
- --conf-file,-f:指定本次启动需要的配置文件,用以指定 Source、Channel 和 Sink 的相关配置
在/opt/nodule创建一个名为 job 的目录,并在 job 目录下添加 flume-netcat-logger.conf 文件,该文件内容为:
# 定义这个agent中各组件的名字
a1.sources = r1
a1.sinks = k1
a1.channels = c1

# 描述和配置source组件:r1
a1.sources.r1.type = netcat
a1.sources.r1.bind = localhost
a1.sources.r1.port = 44444

# 描述和配置sink组件:k1
a1.sinks.k1.type = logger

# 描述和配置channel组件,此处使用是内存缓存的方式
a1.channels.c1.type = memory
a1.channels.c1.capacity = 1000
a1.channels.c1.transactionCapacity = 100

# 描述和配置source  channel   sink之间的连接关系
a1.sources.r1.channels = c1
a1.sinks.k1.channel = c1
1
2
3
4
5
6
7
8
9
10
11
12
13
14
15
16
17
18
19
20
21
2
3
4
5
6
7
8
9
10
11
12
13
14
15
16
17
18
19
20
21
在终端1启动 flume-ng:
提示
启动前通过lsof -i:44444查看44444端口是否被占用,没有输出就是没被占用。
bin/flume-ng agent -c conf -f job/flume-netcat-logger.conf -n a1 -Dflume.root.logger=INFO,console
1
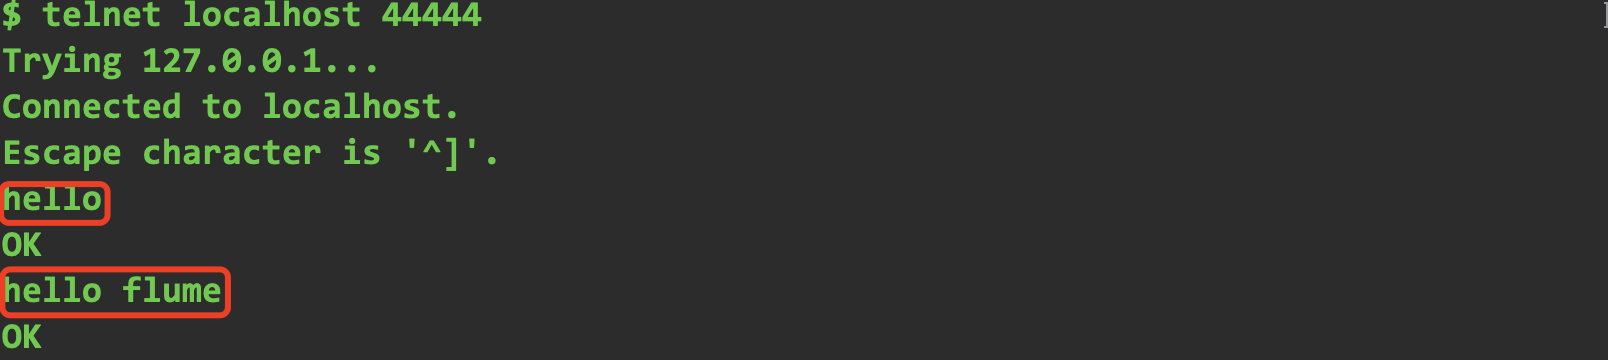
在另一个终端(终端2)使用telnet向44444端口发送数据“hello”和“hello flume”,查看终端1中的输出:
telnet localhost 44444
1

上次更新: 2023/11/01, 03:11:44